Note
Go to the end to download the full example code.
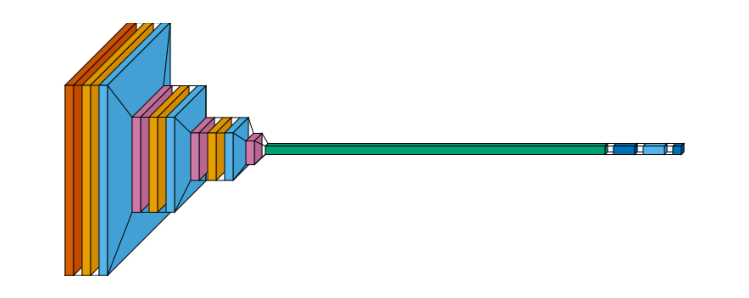
Custom Color#
Visualization of custom color. The synthetic input box can be recolored too, keyed by
visualtorch.Input in color_map just like any real layer type - left
uncustomized, it would default to the same color as Conv2d here, since both would otherwise
claim the same slot in the color wheel.
from collections import defaultdict

import matplotlib.pyplot as plt
import visualtorch
from torch import nn

# Example of a simple CNN model using nn.Sequential
model = nn.Sequential(
    nn.Conv2d(3, 16, kernel_size=3, padding=1),
    nn.ReLU(),
    nn.MaxPool2d(2, 2),
    nn.Conv2d(16, 32, kernel_size=3, padding=1),
    nn.ReLU(),
    nn.MaxPool2d(2, 2),
    nn.Conv2d(32, 64, kernel_size=3, padding=1),
    nn.ReLU(),
    nn.MaxPool2d(2, 2),
    nn.Flatten(),
    nn.Linear(64 * 28 * 28, 256),  # Adjusted the input size for the Linear layer
    nn.ReLU(),
    nn.Linear(256, 10),  # Assuming 10 output classes
)

color_map: dict = defaultdict(dict)
color_map[visualtorch.Input]["fill"] = "#D55E00"  # vermillion
color_map[nn.Conv2d]["fill"] = "#E69F00"  # orange
color_map[nn.ReLU]["fill"] = "#56B4E9"  # sky blue
color_map[nn.MaxPool2d]["fill"] = "#CC79A7"  # reddish purple
color_map[nn.Flatten]["fill"] = "#009E73"  # bluish green
color_map[nn.Linear]["fill"] = "#0072B2"  # blue

input_shape = (1, 3, 224, 224)
img = visualtorch.render(model, input_shape=input_shape, style="flow", color_map=color_map)

dpi = 150  # rendered at 2x this in the final doc build (savefig.dpi=300 in conf.py)
plt.figure(figsize=(img.width / dpi, img.height / dpi), dpi=dpi)
plt.imshow(img)
plt.axis("off")
plt.tight_layout()
plt.show()